Your restaurant floors can be a liability, if they’re not cleaned properly. Slips and falls rank among the top injuries to customers and employees at restaurants. They’re a danger (and a cost!) that can easily be prevented with the proper floor care tools and techniques. There are two main elements to getting a floor cleaned properly for both sanitation and safety needs. The first is getting the right tools for the job and the second is making sure you are using the tools properly.
It is important to use color-coded floor cleaning products to avoid cross-contamination. You don’t want any bacteria or debris from the restroom to get into the kitchen. A color-coded cleaning system designates a specific color of mops, brooms, scrub brushes, buckets, dry mop, etc. for certain areas of your restaurant. That means one color can only be used in the restroom, another only in the kitchen and a third for your dining area.
Tools you’ll need:
1) Broom and Dust pan
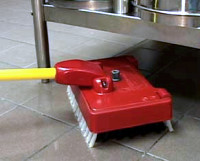
2) Deck Brush
3) Approved floor cleaning solution
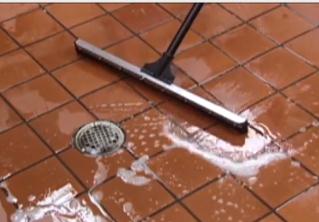
4) Floor Squeegee
5) Mop bucket with wringer and dirty water insert. Fill bucket with clean water and approved floor cleaning solution.
6) Mop (attached to appropriate handle)
7) Wet floor warning sign
Now that you have all of your tools together, you’re ready to begin the cleaning process. Floors should get a thorough cleaning at least once per shift and spot cleaning throughout the day as necessary. Vigilance when it comes to cleaning your floor can be the difference in preventing slips and falls.
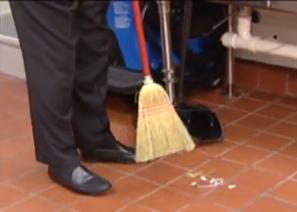
1) Put out wet floor signs. Let customers and co-workers know the floor will be wet and slippery before you start to clean.
2) Sweep up dirt and debris. Start in one edge or corner and sweep in overlapping strokes toward a designated area. Sweep your pile of dirt and debris into your dust pan and empty it into the trash.
3) Scrub away oil. Cover the floor with clean water and an approved cleaning solution. Use a Heavyweighted deck brush to loosen oil on tiles and grout.
4) Squeegee into floor drain. Use a floor squeegee to push the water, cleaning solution, oil into your floor drain. This will also help dry the floor to reduce danger as you begin to mop.
5) Get your mop ready. Dip your mop into the bucket with the clean water and solution. Wring it out so the floor does not get too wet and slippery.
6) Start mopping. The best technique is 1-2-3 flip, 1-2-3 dip. Make one-half of a figure eight (three strokes) with one side of your mop, then flip your mop to complete the figure. Wring out mop into your dirty water insert. This keeps a clean surface on the floor as much as possible. It also helps to pick up the dirt rather than pushing it around. Repeat steps five and six until you’ve finished the floor.
7) Dry Mop
8) Keep the floor sign out. Do not take the sign down until your floor is fully dry. Even a small wet spot can be hazardous.
You can learn more about these steps and how to clean by watching our floor preparation and mopping videos.
Source/Contributor: Century Products